

Protecting a backyard harvest from feathered visitors is one of the most frustrating challenges a home gardener faces. Just as strawberries turn crimson or sweet cherries ripen on the branch, birds can strip a crop in a matter of hours. Knowing how to install bird netting over a garden correctly is the difference between an intact harvest and a tangled mess that traps wildlife or damages delicate foliage. A properly built netting system forms a physical barrier that keeps birds away while allowing sunlight, rain, and beneficial insects to reach your plants without hindrance.
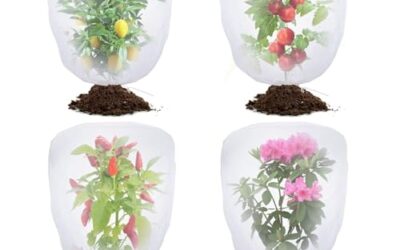
This guide helps home vegetable growers, raised bed gardeners, and backyard orchardists construct safe, durable, and easily accessible netting structures. No specific commercial product line met our verification criteria for this cycle, so the guidance below rests on exclusion principles and installation practice. Rather than recommending unverified commercial packages, we focus on technical specifications, structural frameworks, anchor techniques, and wildlife-safe dimensions so you can choose materials confidently. For small individual plants, an alternative option like the best garden cloche for pest protection may offer localized defense, but broader garden beds demand a dedicated netting setup.
Installing netting successfully requires understanding material strength, mesh aperture, frame design, and proper ground tension. When netting is loose or carelessly draped, birds can peck through the openings or become trapped in slack folds. By establishing a rigid support framework and securing perimeter edges, you protect both your investment and local songbird populations. You can explore broader barrier strategies across our Garden Pest & Wildlife guides to build an integrated defense plan for your yard.
Practical How To Install Bird Netting Over A Garden Buying Guide
Selecting the Right Mesh Size and Material
The mesh size of bird netting determines both its exclusion capability and its safety for local wildlife. Most standard garden netting features mesh apertures ranging from one-quarter inch up to one inch. For general vegetable gardens and berry patches, a diamond or square mesh between one-half inch and three-quarter inch is optimal. Openings larger than three-quarters of an inch can allow small songbirds, such as finches and wrens, to push their heads through and become ensnared, while openings smaller than one-quarter inch can block pollinating bees.
Material composition directly impacts longevity and handling. Extruded polypropylene and knitted high-density polyethylene (HDPE) are the two primary choices. Extruded plastic netting is lightweight and affordable, but it tends to be stiff, tangles easily, and tears when snagged on rough branches. Knitted HDPE netting features a softer texture that drapes smoothly, resists fraying when cut, and handles seasonal stretching without snapping. Look for UV-stabilized formulations to ensure the plastic does not become brittle and crumble after a single summer under direct sun.
Why Frameworks Outperform Direct Draping
A frequent error among beginner gardeners is throwing netting directly over blueberry bushes, tomato cages, or strawberry patches. Direct draping creates severe functional problems. Fruit growing against the outer perimeter presses into the mesh, allowing birds to perch on the outside and peck straight through the holes. Furthermore, expanding shoots grow through the openings, locking the net into the foliage and making removal impossible without cutting stems or tearing the mesh.
Building an overhead support framework solves these issues by maintaining a tensioned buffer zone between the netting and your crop. A framework holds the barrier at least six to eight inches away from foliage, eliminating perching opportunities and preventing fruit contact. Whether using flexible tubing for curved arches or rigid timber for squared cages, a dedicated support structure transforms netting from an awkward temporary wrap into a multi-season exclusion system.
Framework Options for Different Garden Layouts
Choosing the right structural skeleton depends on whether you cultivate in raised beds, long in-ground rows, or freestanding fruit patches. Flexible electrical conduit (EMT), PVC pipe, metal rebar stakes, and wooden posts all offer distinct advantages depending on garden dimensions and seasonal portability.
| Frame Type | Best Garden Application | Key Advantages | Main Tradeoff |
|---|---|---|---|
| PVC or PEX Hoops | Raised beds and low row crops | Low cost, flexible, quick assembly | Can bend under heavy winds |
| Conduit / T-Post Box | Tall vegetable beds and cane berries | Rigid, long-lasting, supports high tension | Requires tools and anchoring anchors |
| Wood Walk-In Cage | Large dedicated berry patches | Permanent, easy harvest access | Higher material cost, fixed footprint |
| Bamboo Teepees | Individual tomato or climbing crops | Biodegradable, simple seasonal setup | Irregular shape makes perimeter sealing harder |
Step-by-Step Hoop Frame Installation for Raised Beds
For raised beds, the hoop system is the most reliable and accessible installation method. Begin by measuring the width and length of your bed. Cut half-inch schedule 40 PVC or flexible PEX tubing into lengths roughly double the width of the bed to produce comfortable head clearance for your plants. Secure short sections of metal conduit or rebar into the interior corners and along the sides every four to five feet, driving them deep into the soil or screwing pipe conduit clamps directly to the inner wooden boards.
Slide the ends of the PVC hoops over the mounting stakes to form clean, uniform arches. To prevent the hoops from shifting, run a single horizontal purlin (a straight PVC pipe or taut wire) along the apex of the arches, securing it to each hoop with UV-rated zip ties or pipe cross-connectors. Once the skeleton is rigid, unfurl the netting along the central spine and gently drape it down both sides, ensuring uniform overhang at the ground level.
Tensioning and Ground Anchoring Techniques
Tension is critical for exclusion and safety. Loose netting billows in high winds, snagging foliage and inviting wildlife entanglement. When securing netting over your frame, pull the material taut like a drum skin across the structural ribs. Avoid pulling so hard that the mesh distorts into elongated slits, as distorted openings reduce barrier effectiveness.
At ground level, the perimeter must be sealed completely. Birds readily hop along the soil looking for gaps underneath the net. On raised beds, clamp the bottom edge using snap clamps attached to the pipes, or secure the hem along the wooden sideboards using wood battens screwed into the box. In open ground, pin the bottom edge firmly using heavy-gauge steel garden staples spaced twelve to eighteen inches apart. Weighing down edges with smooth lumber, bricks, or gravel prevents birds from crawling beneath the perimeter.
Planning Easy Access for Harvesting and Weeding
An installation that is difficult to open turns routine weeding, pruning, and daily harvesting into chores. Avoid permanently zipping or stapling the entire enclosure shut. Instead, build intentional entry points using reusable fastening hardware.
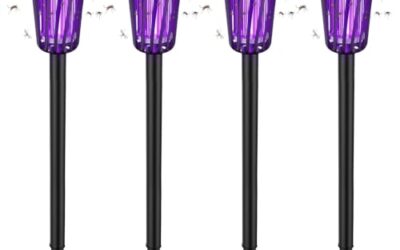
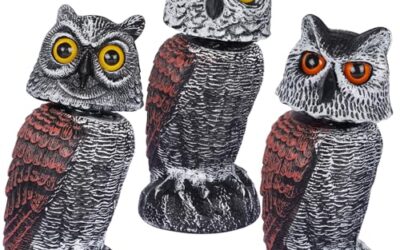
For hoop structures, leave one side secured with removable greenhouse snap clamps or spring clamps rather than permanent cable ties. This setup allows you to lift the curtain upward in seconds, perform garden maintenance, and clip the edge back down. On larger walk-in frames, create an overlapping doorway flap weighted at the bottom hem with a length of conduit, ensuring it drops securely into place after you pass through. Gardeners who want secondary deterrence during peak pest surges can pair physical netting with visual deterrents, such as the best owl decoy for garden pests, or dynamic sensory methods like the best solar animal repeller for garden perimeter protection.
Wildlife Safety and Entanglement Prevention
Monofilament and fine plastic mesh present serious hazards to wildlife if installed incorrectly. Small birds, harmless garter snakes, and beneficial lizards can become ensnared in loose folds. The primary cause of entanglement is loose, billowing netting left dangling at ground level. A taut, firmly anchored net provides a rigid surface that animals bump against and turn away from rather than catching an ankle or wing.
To maximize safety, choose knitted netting with distinct, solid-colored strands rather than invisible, hair-thin monofilament. White, green, or black knitted nets provide visual contrast that flying birds can detect from a distance. Inspect your netting enclosure daily during the ripening season. If an animal ever becomes trapped, approach calmly with leather gardening gloves, cover the creature gently with a towel to reduce stress, and carefully cut the mesh away using blunt-nosed shears rather than pulling.
End-of-Season Removal and Storage
Bird netting should not remain in the garden through the winter unless you are actively sheltering cold-season brassicas from pests. Heavy winter snow and ice loads will collapse PVC hoops and tear the mesh. Furthermore, leaving netting out unnecessarily accelerates UV breakdown and risks trapping non-migratory winter birds.
Once harvesting finishes, unclamp the netting carefully on a dry day, shaking off dried leaves, twigs, and debris. Rather than balling the net into a knot, roll it smoothly around a cardboard shipping tube, a piece of scrap PVC pipe, or a wooden spindle. Secure the rolled bundle with hook-and-loop straps and store it inside a rodent-proof tote in your shed or garage. Proper storage ensures your netting remains tangle-free and ready for quick deployment the following spring.
Research Methodology and Evaluation Standards
At Dove Creek Gardens, our editorial evaluation process focuses on the practical mechanics, material physics, and biological safety of garden protection systems. We regularly review product catalogs, manufacturer specifications, and regional gardening feedback to identify reliable exclusion solutions. During our September 2026 review, no listing met our verification requirements for this topic. In keeping with our strict editorial standards, we do not fabricate brand rankings or recommend products that lack verified data.
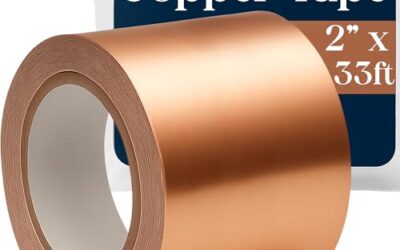
Our analysis relies on material durability benchmarks, including tensile ratings of knitted high-density polyethylene versus extruded polypropylene, UV inhibitor stabilization rates, and aperture safety ratios. We evaluate how physical barriers interact with diverse gardening styles, prioritizing setups that accommodate older gardeners who need accessible reach, as well as compact yards with tight spatial boundaries. Ground-level pests often require multi-tiered defenses, where netting keeps birds away from seedlings while barriers like the best copper tape for slugs and snails protect low plant stems from crawling invaders.
We emphasize transparency across all our content. Our insights are grounded in horticultural design principles and structural evaluation rather than simulated laboratory claims. We evaluate exclusion barriers against three fundamental criteria: effective crop protection, human operational convenience, and humane wildlife safety.
Frequently Asked Questions
Can I drape bird netting directly over tomato plants or fruit bushes?
Direct draping is not recommended because fruit pressing against the outer mesh remains vulnerable to bird pecking. Branches also grow through the openings, tangling the net and making end-of-season removal difficult. Installing a simple frame keeps the netting elevated away from leaves and fruit.
What mesh size is safest for preventing bird entanglement?
A mesh size between one-half inch and three-quarters of an inch provides the safest balance for garden protection. Larger holes risk trapping the heads of small songbirds, while mesh smaller than one-quarter inch can interfere with bees and other beneficial pollinating insects.
How do I keep birds from getting under the edges of garden netting?
Ground-level entry is prevented by anchoring the perimeter firmly without slack. Use heavy metal garden staples every twelve inches on bare soil, or secure the net edge with flat wooden battens, bricks, or pipe snap clamps directly against raised bed frames.
Does bird netting prevent bees and other pollinators from reaching plants?
Standard one-half to three-quarter inch bird netting allows honeybees, bumblebees, and small solitary pollinators to pass freely through the openings. If you use ultra-fine insect barrier netting instead, you must roll up the sides during bloom periods to allow proper pollination.
How many seasons does polyethylene bird netting typically last?
High-quality knitted HDPE netting with UV stabilizers typically lasts three to five seasons when taken down and stored each autumn. Lightweight extruded plastic netting degrades faster, often becoming brittle after one or two summers of intense sun exposure.
How to install bird netting over a garden with raised beds versus in-ground rows?
For raised beds, hoops can be mounted directly to the timber sidewalls with conduit brackets and secured using snap clamps. In-ground garden rows require driving rebar or wooden stakes deep into the dirt to anchor the hoops and pinning the bottom hem with steel landscape staples.
Continue your garden research
Browse more practical guides in Garden Pest & Wildlife.
For product comparisons, see Best Deer Repellent For Vegetable Gardens 2026: Reviews and Buying Guide.
See how Dove Creek Gardens researches and compares products.