


Operating a compact greenhouse brings enormous satisfaction, yet limited square footage can quickly lead to overcrowded staging, blocked light, and frustrated gardeners. When trays pile up on every flat surface and watering cans obstruct the narrow walkway, plant health and daily comfort both decline. Learning How To Organize A Small Greenhouse transforms a chaotic enclosure into a productive, enjoyable growing sanctuary. This practical guide assists beginner growers, urban gardeners working with tight footprints, and experienced backyard horticulturists seeking to extract every square foot of growing capacity from their structure.
Commercially packaged all-in-one greenhouse organizer systems rarely fit the diverse interior dimensions and framing profiles of hobby structures, so this guide works from layout principles instead. Instead of relying on rigid proprietary kits, successful organization requires modular components, thoughtful vertical tiers, and proper environmental zoning. By assessing functional criteria such as shelf load limits, corrosion resistance, pathway clearance, and natural air circulation, you can customize a layout tailored to your specific garden goals. If you are exploring broader structure options, our comprehensive resource section on Greenhouses & Garden Storage offers foundational guidance.
Whether you manage a freestanding six-by-eight-foot glasshouse or a walk-in plastic tunnel, effective organization focuses on accessibility and plant physiology. Balancing incoming sunlight with adequate airflow ensures your crops thrive while keeping essential hand tools within easy reach.
Organizing a small growing space requires balancing physical storage with biological necessity. Every shelf, bracket, and container affects air movement and solar exposure. The following sections outline key structural elements and purchasing decisions necessary to optimize your small greenhouse layout.
Staging and Shelving Systems: Maximizing Vertical Space
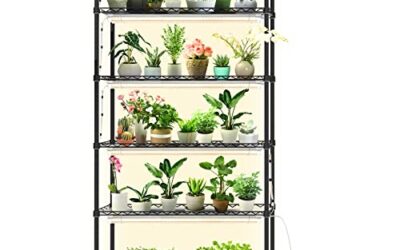
Vertical shelving forms the backbone of any compact greenhouse. Rather than spreading pots across ground-level gravel or low benches, install multi-tier staging that takes advantage of vertical height. Heavy-duty slatted aluminum, powder-coated steel, or rot-resistant cedar shelving units allow water to drain freely while encouraging bottom airflow around root zones.
Avoid solid timber boards or non-draining plastic surfaces, which harbor stagnant moisture, algae, and fungal spores. When selecting freestanding or wall-mounted staging, check load capacities carefully. Wet soil in large nursery flats weighs considerably more than dry compost. Staggering shelf depths, placing narrower shelves above deeper lower benches, prevents upper tiers from casting harsh shade over plants below.
Microclimate Zoning: Balancing Light, Heat, and Humidity
Every small greenhouse contains subtle microclimates that dictate where specific varieties thrive. The warmest air and highest solar intensity naturally congregate near the roof ridge and south-facing walls. Reserve upper shelves for heat-loving crops such as peppers, eggplants, or trailing tomatoes during peak development.
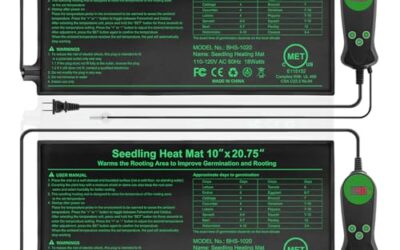
Middle tiers receive consistent indirect light, making them ideal for young seed trays and propagation work. Integrating the best seed starting heat mat with thermostat onto your middle bench ensures accurate bottom heat for tender germinating seeds without overheating mature foliage above. Lower ground-level sections stay cooler and maintain higher relative humidity, creating an ideal microclimate for shade-tolerant greens, rooting cuttings, or storing bags of potting media.
Workflow and Pathway Clearance: Safe and Comfortable Access
A functional walkway is vital for safety, physical comfort, and routine maintenance. A central path should measure at least 24 inches wide to permit gardeners to bend, carry heavy watering cans, and reach lower shelves without knocking tender stems. For older gardeners or those prioritizing accessible mobility, 30 to 36 inches of unobstructed clearance is highly recommended.
Ground surfacing also influences cleanliness. Clean pea gravel, interlocking perforated deck tiles, or textured paving slabs provide stable, non-slip footing while permitting excess runoff to soak into the drainage base. Avoid bare soil pathways that turn into slippery mud after watering routines.
Consolidating Workstations and Tool Storage
Devoting an entire corner to clutter limits growing potential. Positioning a streamlined workstation, such as the best potting bench with storage, consolidates pruners, dibbers, labels, and soil tubs into a single compact area. Benches equipped with lower shelves or enclosed drawers protect seed packets and fine tools from constant humidity.
Wall-mounted magnetic tool strips, hanging wire baskets, and S-hooks fastened to the structure frame utilize bare upright supports. Keep daily tools like hand shears, misting bottles, and garden markers visible at eye level so tasks remain orderly and efficient.
Temperature Control, Shading, and Ventilation Layout
Even the most tidy interior fails if temperature swings stress your plants. Roof vents and low side louvers require uninterrupted clearance to draw cool air from the floor and exhaust hot air through the peak. Never stack supply containers or tall pots in front of ventilation louvers.
Installing an automatic greenhouse vent opener regulates roof windows mechanically without requiring electrical cords or manual intervention. In midsummer, combining cross-ventilation with the best greenhouse shade cloth for summer shields delicate foliage from scorch and maintains moderate internal temperatures, protecting both your crops and your organized setup.
| Greenhouse Zone | Ideal Usage | Key Storage or Equipment Requirement |
|---|---|---|
| Upper Ridge Level | Heat-tolerant crops, hanging trailing baskets | Sturdy purlin hooks, clear roof vent pathways |
| Middle Staging Tier | Seed germination, potting, daily watering | Slatted drainage staging, propagation heat mats |
| Lower Bench / Ground | Cool greens, dormancy storage, damp cuttings | Perforated storage bins, raised duckboard staging |
| Pathway and Perimeter | Access clearance, hanging hand tool storage | Wall hooks, magnetic tool racks, non-slip flooring |
Pest Prevention, Airflow, and Cleanliness
Tight enclosures with dense foliage are susceptible to pests such as whiteflies, spider mites, and aphids, as well as fungal outbreaks like powdery mildew. Overcrowded shelves prevent air from circulating freely through leaf canopies. Maintain at least two inches of space between mature pots to allow fresh air movement.
Organize routine sanitation by establishing a designated wash station. Keep a clean tub, stiff scrubbing brush, and mild soap solution available to wash recycled nursery trays before re-potting. If excess non-plant gear crowds your greenhouse aisles, shifting large ladders, lawn tools, and surplus soil bags into the best garden storage shed for small backyard keeps your growing environment sanitary and strictly focused on plants.
Seasonal Transitions and Adaptability
An organized greenhouse changes configurations across the seasons. In early spring, your layout prioritizes multiple shallow staging tiers to maximize plug tray numbers. By midsummer, young plants move out to raised beds, and internal staging may need partial dismantling to accommodate tall indeterminate tomatoes or climbing cucumbers growing from ground-level containers.
Choose folding or easily removable shelf brackets rather than fixed wooden framing. Modular setups enable swift reconfiguration in minutes, allowing your small structure to transition seamlessly from a high-density nursery in April to a warm summer greenhouse in July.
Research Methodology and Evaluation Standards
Our evaluation process at Dove Creek Gardens focuses on genuine utility, structural safety, and horticultural suitability. Because every backyard structure features differing roof angles, frame extrusions, and floor footprints, we do not rely on manufacturer marketing claims or generic consumer reviews. Instead, our editorial team examines physical specifications, structural tolerances, corrosion-resistant coatings, and real-world owner feedback.
Our research-based analysis does not claim laboratory testing or sponsored product validation. We screen organizational components against structural load ratings, compatibility with common aluminum frame channels, stability under high humidity conditions, and ease of routine cleaning. We review and update these recommendations throughout September 2026 to ensure gardeners receive practical, current guidance for managing compact spaces.
Frequently Asked Questions
What is the best way to arrange shelves when learning how to organize a small greenhouse?
Arrange taller, wider staging along the north or east side of your greenhouse so it does not cast shade over the rest of the structure. Use stepped, slatted staging where upper shelves are narrower than lower benches. This allows sunlight to reach every tier while ensuring drainage water passes cleanly through to the floor.
How do I keep a small greenhouse organized during busy spring seed starting?
Group seedlings by germination temperature and light requirements rather than pot size. Utilize stackable wire racks, uniform 1020 seed flats, and clear plastic plant labels to minimize visual confusion. Keeping seed-starting supplies like dibbers, seeds, and soil scoops in dedicated under-bench tubs prevents bench clutter.
Can I use standard wooden shelving inside a greenhouse?
Standard untreated lumber or indoor particle board will quickly warp, rot, and harbor fungal diseases under warm, humid greenhouse conditions. If you choose wood, select naturally rot-resistant species such as cedar, cypress, or redwood, and build slatted surfaces to promote water drainage and air circulation.
How much walkway width do I need when organizing a small greenhouse?
Aim for a minimum central pathway width of 24 inches for safe movement and comfortable kneeling. If you use a garden cart, carry wide nursery trays, or require accessible mobility space, widening the central pathway to 30 to 36 inches is strongly advised.
Where should heavy soil bags and extra pots be stored?
Store heavy soil bags and compost tubs underneath ground-level staging in sealed, moisture-proof plastic storage totes. This keeps pathways clear, stabilizes the structure by keeping center-of-gravity weight low, and prevents pests from nesting in damp soil bags.
Continue your garden research
Browse more practical guides in Greenhouses & Garden Storage.
For product comparisons, see Best Portable Greenhouse for Backyard Use Right Now.
See how Dove Creek Gardens researches and compares products.