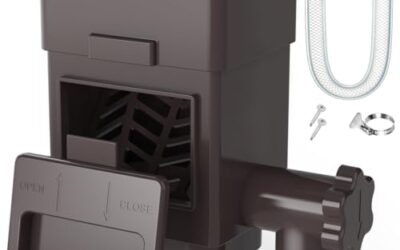


A leaking hose timer can waste water, weaken irrigation coverage, and leave a connection dripping even when the timer is off. The cause usually sits at a threaded connection, washer, valve housing, or hose fitting. Finding the leak location first prevents unnecessary replacement.
This guide explains why does my hose timer leak, how to inspect each connection, and when repair makes more sense than replacement. It helps beginner gardeners, older gardeners who want a simple process, and homeowners managing containers, raised beds, or small lawns. For broader scheduling features, see our guide to water timers with rain delay.
Why Does My Hose Timer Leak?
Most hose timer leaks come from a damaged or misplaced rubber washer, cross-threaded connection, loose fitting, excessive water pressure, or a cracked plastic body. A timer can also leak because an adapter does not match the hose thread correctly. Water may travel along the underside of the timer, making the leak appear farther from its source.
Start by locating leak
Turn off water at the spigot. Dry the timer and nearby connections with a towel, then restore water slowly. Watch the inlet, outlet, valve seams, and hose ends separately. A tissue held near each joint can reveal a slow seep that is difficult to see.
- Leak at spigot connection: inspect inlet washer and thread alignment.
- Leak at hose connection: inspect outlet washer, hose gasket, and fitting threads.
- Leak from timer body: look for cracks, seam damage, or valve failure.
- Leak only during watering: inspect pressure, flow restriction, and downstream fittings.
Check washer and gasket condition
Flat rubber washers create the seal inside many garden hose connections. A washer can fall out during installation, shift sideways, harden with age, or develop a cut. Remove the connection and confirm washer placement before tightening anything.
Replace a washer when it looks flattened, brittle, split, or permanently distorted. Use a washer intended for garden hose connections. Do not stack several washers to compensate for a poor fit, because the joint may sit unevenly and continue leaking.
Align threads before tightening
Threaded plastic parts damage easily when forced. Hold timer and hose straight, turn the connection backward briefly until threads settle, then turn forward by hand. Stop when resistance rises. Use hand pressure first; excessive wrench force can crack plastic or deform the washer.
Thread seal tape does not fix every hose connection. Many garden hose joints seal against a washer, not against thread flanks. Tape may make a washer-sealed joint harder to seat correctly. Use tape only where timer instructions call for a threaded seal and keep tape away from the water passage.
Inspect pressure and flow
High incoming pressure can stress a timer, especially when a valve closes suddenly or a downstream line becomes restricted. A pressure regulator can help when manufacturer instructions support its use, but it cannot repair a cracked housing or bad seal.
Check for kinked tubing, blocked filters, closed downstream valves, and clogged emitters. These restrictions can change pressure around the timer. If a leak appears only while water flows, inspect the outlet and downstream system before assuming the timer body has failed.
Confirm hose and fitting compatibility
Match timer inlet and outlet connections with standard garden hose fittings or the adapter specified in its instructions. A fitting that turns only a few threads, wobbles, or bottoms out before the washer compresses can leak even when it feels tight.
Rigid or heavy hoses can pull sideways on a timer mounted at a spigot. Support the hose with a gentle bend or a separate hose guide. This matters for older gardeners and anyone who wants to avoid repeated bending, twisting, or force at the faucet.
Decide whether repair makes sense
Repair makes sense when the leak comes from a removable washer or fitting and the timer body remains intact. Replacement becomes more sensible when plastic is cracked, a valve seam leaks, controls no longer close the water path, or a repair requires opening a sealed housing.
Keep the timer out of service while water reaches electrical compartments or controls. Follow manufacturer instructions for disassembly. Never bypass a shutoff valve or continue operation around exposed wiring, damaged batteries, or a cracked housing.
Install timer with fewer leak risks
- Flush grit from the spigot before attaching timer.
- Place one clean washer in each washer-sealed connection.
- Align threads by hand before applying moderate hand pressure.
- Keep hose weight supported instead of hanging from timer.
- Open spigot gradually and inspect every joint.
- Run one short irrigation cycle before leaving system unattended.
For raised beds or tree lines, a timer should connect to a layout that matches available flow. Our guide to drip line for trees explains why downstream restrictions and fitting choices matter. Micro-sprinkler users can also review micro sprinkler kit considerations before connecting a timer.
Prepare for seasonal storage
Freezing water can expand inside a timer and crack its housing. Before freezing weather, shut off the spigot, remove timer and hoses, drain trapped water, and store equipment in a dry protected place. Remove batteries if manufacturer instructions recommend it.
At spring setup, inspect washers, threads, battery compartment, and body seams. Replace worn seals before pressurizing the line. Store hoses without sharp bends that can pull on the timer during the next installation.
How This Guide Was Put Together
Dove Creek Gardens evaluates hose timer guidance around failure points that affect real home irrigation: connection type, washer placement, thread alignment, pressure behavior, hose weight, drainage, and seasonal storage. We assess each issue by asking what a homeowner can inspect safely and what condition requires replacement or manufacturer support.
Recommendations depend on garden layout. Containers may need compact connections and easy controls, while raised beds and drip lines require attention to flow restrictions and downstream fittings. Accessibility also matters: stable hose routing and hand-tight connections reduce twisting and force.
This guide is reviewed during November for practical seasonal maintenance, winter storage, and spring restart advice. Product-specific rankings do not appear here. The editorial focus stays on diagnosis and selection criteria because a leak source should be identified before choosing replacement equipment.
Frequently Asked Questions
Why does a hose timer leak at the faucet?
Check the inlet washer first, then inspect thread alignment and fitting compatibility. A sideways hose load or cross-threaded connection can prevent the washer from sealing.
Can I fix a leaking hose timer with thread tape?
Only use thread tape where manufacturer instructions call for it. Many hose connections seal with a rubber washer, so tape may not correct a misplaced or damaged washer.
How tight should a hose timer connection be?
Align threads and tighten by hand until the washer seats. Excessive force can deform the washer or crack plastic. Use tools only when instructions specifically allow them.
Why does my timer leak only when watering?
Flow may expose a weak outlet seal, restricted downstream line, or pressure problem. Inspect the outlet while water runs, then check kinks, filters, valves, and emitters.
Should I repair or replace a leaking hose timer?
Repair a removable washer or fitting when timer housing stays intact. Replace or contact the manufacturer for a cracked body, leaking valve seam, damaged controls, or water near electrical parts.
How should I store a hose timer in winter?
Shut off water, remove the timer, drain it, and store it in a dry protected location before freezing weather. Follow battery-storage instructions and inspect seals before spring use.