


Planning an efficient home irrigation system often comes down to one critical decision: determining what size drip tubing for vegetable garden beds will deliver steady water without losing pressure. Using tubing that is too narrow restricts flow to your furthest crops, while oversized systems can add unnecessary expense and make connections cumbersome. Homeowners and vegetable growers need practical dimensions that balance volume, distance, and water pressure across raised beds, container rows, and in-ground plots.
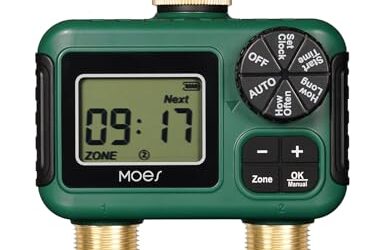
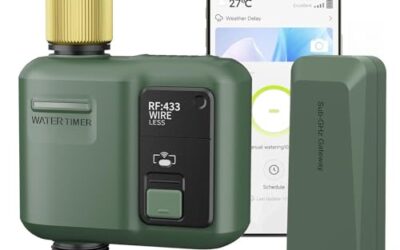
For this guide, we evaluated standard residential drip irrigation dimensions and hydraulic requirements. Because our catalog currently includes 0 verified standalone tubing packages meeting our editorial evaluation criteria, this guide focuses on the technical principles and sizing specifications you need to design your own layout. You can integrate your system with tools like a dual outlet hose timer to manage multi-bed irrigation zones automatically.
Selecting the correct tubing diameter ensures your vegetables receive uniform hydration from the start of the row to the end. Below, we break down mainline options, feeder micro-tubing limits, flow rate calculations, and common layout mistakes so you can build a reliable garden watering system with complete confidence.
Complete Sizing and Buying Guide for Vegetable Garden Drip Tubing
Mainline Tubing: Why 1/2-Inch Is the Standard Choice
For almost every backyard vegetable garden, 1/2-inch poly tubing serves as the backbone of the irrigation layout. Technically measuring approximately 0.600-inch inside diameter (ID) and 0.700-inch outside diameter (OD), this size carries sufficient water volume to supply multiple garden beds simultaneously. It easily supports a total flow rate of up to 200 to 240 gallons per hour (GPH) across runs up to 200 feet long without severe pressure loss.
Using 1/2-inch tubing as your primary header allows you to snake water between raised beds or down central pathways. Once the mainline is in place, you can pierce it directly with hole punches to install individual drippers or insert barbed connectors to branch off into smaller lines.
Feeder Lines: When to Use 1/4-Inch Micro-Tubing
Quarter-inch micro-tubing (often measuring 0.170-inch ID and 0.250-inch OD) is designed exclusively for short secondary distribution lines. Gardeners frequently use 1/4-inch tubing to branch off the 1/2-inch mainline to deliver water directly to individual tomato cages, squash hills, or container plants. It is also sold as perforated emitter tubing with pre-installed drippers spaced at 6-inch or 12-inch intervals.
However, 1/4-inch tubing has strict capacity limits. A single run of 1/4-inch line should never exceed 30 feet in total length, and its maximum flow capacity is roughly 30 gallons per hour. Exceeding these limits creates friction loss, leaving the plants at the far end of the line underwatered.
Comparing Drip Tubing Sizes
Understanding the operational parameters of standard tubing sizes helps prevent underpowered layouts. The table below illustrates the functional capacities of common residential irrigation tubing:
| Tubing Size | Primary Garden Role | Maximum Recommended Length | Maximum Flow Capacity |
|---|---|---|---|
| 1/2-Inch Poly Tubing | Mainline and header manifolds | 200 feet | 200 to 240 GPH |
| 1/4-Inch Micro-Tubing | Short feeder runs and spot emitters | 30 feet | 25 to 30 GPH |
| 3/4-Inch Poly Tubing | Large gardens, low pressure, or long runs | 400+ feet | 450 to 480 GPH |
Calculating Emitter Spacing and Run Lengths
When selecting drip tubing with built-in emitters, spacing determines water coverage and soil saturation. For closely spaced vegetables such as lettuce, carrots, onions, and radishes, tubing with 6-inch or 9-inch emitter spacing creates a continuous band of moisture in friable garden soil. For larger crops like brassicas, peppers, and tomatoes, 12-inch or 18-inch emitter spacing targets the root zones without wasting water between plants.
Always sum the discharge rates of all emitters connected to a single line. For example, if you run twenty 0.5-GPH emitters on a line, the water demand is 10 GPH. A 1/4-inch line can easily support this demand, provided the overall physical length stays under 30 feet. If your bed requires more than 30 GPH, you must run a 1/2-inch line into the bed instead.
Water Pressure and Regulation Requirements
Household outdoor spigots typically supply water at 40 to 70 pounds per square inch (PSI). Standard drip tubing and emitter fittings, however, are engineered to operate between 15 and 25 PSI. Subjecting thin-walled drip lines to unreduced household pressure causes emitters to pop loose and tubing to split at barbed fittings.
A dependable drip assembly always starts with a pressure regulator rated at 20 or 25 PSI connected right after the spigot or timer. In addition, install a 150-mesh or 200-mesh filter directly upstream of your drip lines. Particulates and mineral sediment quickly clog tiny dripper orifices, diminishing water output over time.
Source Connections and Automation
A complete vegetable irrigation system functions best when automated. Connecting your mainline tubing assembly to a best Wi-Fi water timer for garden hose allows precise adjustments based on seasonal heat or rainfall forecasts. Gardeners planning extended summer travel can rely on a best automatic watering system for vacation setup to protect crops from drought stress while away.
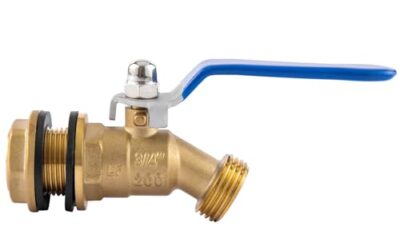
If you rely on rainwater harvesting with a best rain barrel for small garden setups, keep in mind that gravity systems generate much lower pressure. In gravity configurations, 1/2-inch or even 3/4-inch tubing should be used exclusively to minimize internal friction, while avoiding high-resistance pressure-compensating emitters.
Winterizing, Flushing, and Maintenance
Routine maintenance keeps drip tubing functional for years. At the end of every branch line, install a figure-eight clamp or threaded flush valve. Open these valves once a month for thirty seconds while the water runs to purge trapped fine silt and organic debris from the line ends.
In regions that experience freezing winters, drain the tubing thoroughly before temperatures dip below freezing. While polyethylene tubing tolerates light frost, residual water trapped inside emitters and rigid barbed fittings can freeze, expand, and rupture the plastic components. Storing timers and regulators indoors during winter preserves their internal seals.
Research Methodology and Trust
At Dove Creek Gardens, our Watering & Irrigation guides rely on rigorous technical analysis and standard hydraulic engineering principles. Rather than relying on marketing claims, we evaluate dimensional tolerances, flow dynamics, operating pressures, and component compatibility to determine practical garden setups.
Our review team assesses products by cross-referencing manufacturer specifications against published flow-rate curves and real-world owner feedback. Because no specific commercial tubing bundles in our database matched our strict criteria during our September 2026 update, we have focused entirely on verified generic specifications to help gardeners make informed shopping choices without brand bias.
Frequently Asked Questions
Can I use 1/4-inch drip tubing for my entire vegetable garden?
Using 1/4-inch tubing for an entire garden is only suitable for very small spaces, such as a single compact raised bed or patio planter box. Because 1/4-inch lines can only deliver roughly 30 gallons per hour and should not exceed 30 feet in length, larger gardens will suffer severe pressure drops. A 1/2-inch mainline is necessary for multi-bed or expansive garden layouts.
What is the difference between drip line and blank drip tubing?
Blank drip tubing is solid pipe with no pre-cut holes, used primarily to transport water from the faucet to garden beds without emitting water along the path. Drip line, in contrast, features factory-installed emitters sealed inside the tubing at uniform intervals, making it ideal for watering long, closely planted vegetable rows.
How many drip emitters can I put on a 1/2-inch line?
A standard 1/2-inch poly line supports roughly 200 to 240 gallons per hour of total water volume. If you use 1-GPH emitters, you can install approximately 200 emitters along the run. If you choose 0.5-GPH emitters, you can place up to 400 emitters, provided the total run length stays within 200 feet.
Should drip tubing be buried or placed on top of garden soil?
Standard surface drip tubing should be laid on top of the soil and anchored with ground stakes, then covered with a 2-inch to 3-inch layer of organic mulch. Burying surface drip lines under soil can cause soil particles and roots to intrude into the emitter outlets, leading to early clogs and uneven watering.
How long should I run drip irrigation for vegetables?
Run times depend on your soil type, emitter output rate, and current weather conditions. For typical raised beds with 0.5-GPH or 1-GPH emitters, running the system for 30 to 45 minutes two to three times per week provides deep moisture to the root zone. Check the soil depth with a trowel to ensure moisture reaches 6 to 8 inches deep.
Continue your garden research
Browse more practical guides in Watering & Irrigation.
For product comparisons, see Best Drip Irrigation Kits for Raised Beds, Compared.
See how Dove Creek Gardens researches and compares products.