


A damaged or punctured drip line can compromise your entire garden irrigation setup. When water sprays from a split hose or seeps uncontrolled from an unintended hole, the surrounding beds risk becoming waterlogged while downstream plants wither from lack of pressure. Understanding how to repair a leaking drip line allows home gardeners to restore balanced moisture without having to replace an entire irrigation zone.
Whether you manage raised vegetable beds, perennial borders, or container plantings, maintaining drip equipment requires practical problem-solving. This overview focuses strictly on proven repair methods, standard hardware specifications, and preventative maintenance strategies. If you want to explore wider system setups, visit our main guide on Watering & Irrigation.
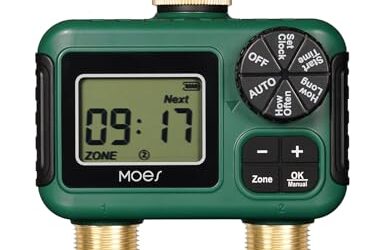
Selecting the right repair method depends on the size of the drip tubing, the nature of the leak, and system operating pressure. Gardeners dealing with automated schedules, such as those set with a dual outlet hose timer, benefit from making durable mechanical repairs that withstand repeated pressurization cycles throughout the growing season.
Complete Guide to Repairing a Leaking Drip Line
Fixing low-pressure micro-irrigation lines is straightforward once you identify the point of failure. Unlike rigid plumbing, polyethylene drip tubing can be spliced, patched, or adapted using inexpensive barbed fittings and basic hand tools.
Diagnosing the Leak Type
Before cutting any tubing, inspect the leak under normal operating pressure. Common issues include clean punctures from garden trowels, splits along tubing seams caused by freeze damage, loose emitter connections, or tubing blowouts near end caps. Pinpointing whether the failure is a small hole or a structural tear determines whether you need a simple plug or a full splice.
Using Goof Plugs for Small Punctures
Goof plugs are double-sided plastic stoppers designed specifically to seal misplaced emitter punch holes or tiny punctures in 1/2-inch or 5/8-inch mainline tubing. To install one, turn off the water supply, clear soil away from the puncture, and push the larger end of the plug directly into the hole until it snaps firmly into place. If the hole has torn into an irregular shape, a plug will not seal reliably, requiring you to cut and splice that section instead.
Splicing Damaged Poly Tubing with Barbed Couplers
When tubing is severed, crushed, or split, splicing is the most durable solution. Use sharp bypass pruners or a dedicated tubing cutter to make a square cut through the damaged area, removing any cracked material. Insert a barbed straight coupling into both open ends. For 1/2-inch tubing with tight tolerances, softening the cut ends in warm water makes insertion significantly easier without weakening the plastic wall.
Tubing Sizing and Fitting Compatibility
A frequent mistake when learning how to repair a leaking drip line is using mismatched fittings. Polyethylene tubing designated as 1/2-inch can vary in outside diameter, commonly measuring 0.620 inches, 0.700 inches, or 0.710 inches depending on the manufacturer. Standard barbed fittings intended for 0.700-inch line will leak or blow off 0.620-inch tubing. When the exact diameter is unknown, universal compression fittings or lock-collar fittings provide an adjustable mechanical seal.
Managing Operating Pressure
Repeated leaks along drip runs often signal excessive water pressure. Standard household spigots operate between 40 and 70 PSI, whereas typical drip systems require regulated pressure between 15 and 25 PSI. If high water pressure forces fittings apart, install an inline pressure regulator directly downstream of your faucet or valve. Regulated lines protect splices and prevent emitters from blowing out when paired with an automated schedule like a vacation watering setup.
Flushing and Pressure Testing
After inserting your repair coupling or goof plug, do not close the line immediately. Remove the end clamp or flush valve at the termination of the run, turn on the water for 30 to 60 seconds to purge dirt and plastic shavings introduced during the repair, and then reseal the end. Inspect the repair site for weeping or loosening before burying or mulching over the tubing.
Seasonal Maintenance and Winter Protection
Freezing temperatures represent a primary cause of split drip lines. Water trapped inside rigid tubing expands, tearing the wall near ground level. In cold winter regions, disconnect your system from the hose bib, drain low points, and use compressed air or gravity drainage to evacuate remaining moisture. Store timers and delicate regulators indoors until spring.
Research Methodology and Trust
At Dove Creek Gardens, our editorial recommendations follow strict technical relevance criteria. For this maintenance topic, we reviewed plumbing specifications, polyethylene manufacturing standards, operating pressures, and mechanical repair techniques to assemble an accurate how-to framework. We do not claim physical laboratory testing where it did not occur, relying instead on documented manufacturer tolerances and field-proven gardening practices.
Our database screening evaluated compatibility across standard residential drip tubing sizes (1/4-inch distribution lines and 1/2-inch to 5/8-inch mainlines), pressure tolerance thresholds, and coupling styles. System guides are updated during September 2026 to ensure compatibility with currently available hardware standards across home and community gardens.
Frequently Asked Questions
Can you patch a drip line with duct tape or electrical tape?
Adhesive tapes do not work reliably for drip line repairs. Constant moisture, soil contact, and water pressure degrade adhesive within hours, leading to renewed leaking. Always use a mechanical barbed coupler or a goof plug designed specifically for irrigation tubing.
How do I repair a leak in 1/4-inch micro-tubing?
For damaged 1/4-inch feeder lines, cut away the split section and join the two pieces using a 1/4-inch barbed connector. If the micro-line has detached from the main line, trim the stretched end and re-punch or reinsert the barbed adapter firmly into the mainline.
What causes drip line fittings to blow out repeatedly?
Frequent blowouts typically indicate that your operating pressure exceeds 25 to 30 PSI, or that the fitting diameter is slightly smaller than the internal diameter of the tubing. Installing a 25 PSI pressure regulator at the spigot prevents over-pressurization.
Should drip tubing be buried or laid under mulch?
Polyethylene drip tubing should generally rest on the soil surface beneath a light layer of organic mulch. Burying standard drip tubing directly in compacted soil makes finding and repairing leaks difficult and can allow plant roots to clog integrated emitters.
How long do repaired drip lines typically last?
A properly installed barbed splice or compression coupling will last as long as the surrounding tubing, often 3 to 7 years or more. Ensuring proper winterization and pressure regulation maximizes the lifespan of both new tubing and spliced joints.