


Installing a micro-irrigation layout is one of the most effective ways to deliver consistent moisture directly to plant roots, but establishing the correct operating pressure is critical to prevent system failure. Many homeowners wonder what pressure does drip irrigation need when connecting micro-tubing to an outdoor spigot that delivers full municipal force. Standard household water supplies supply water at pressures far too intense for delicate drip fittings, leading to blown emitters, split distribution lines, and erratic watering. This guide outlines the exact hydraulic parameters required to keep your garden thriving, whether you water a series of raised vegetable boxes, patio containers, or shrub borders.
While 0 commercial kits were pre-selected for this analysis, we evaluate the universal engineering specifications, emitter ratings, and pressure management components that dictate irrigation performance. Beginners, seasoned growers, and gardeners seeking to optimize their watering and irrigation setups will find practical operating parameters below to safeguard their lines against pressure-related damage.
Practical Guide to Drip Irrigation Water Pressure
Understanding the interplay between water pressure and flow rate is essential for building a reliable, low-maintenance garden watering network. Micro-irrigation equipment operates under fundamentally different mechanical principles than standard lawn sprinklers, demanding dedicated regulation at the water source.
Standard Pressure Requirements (15 to 30 PSI)
Standard residential drip irrigation operates most reliably between 15 and 30 pounds per square inch (PSI). Within this window, 20 to 25 PSI represents the optimal baseline for the vast majority of residential half-inch polyethylene mainline tubing, quarter-inch distribution lines, and point-source emitters. Operating within this range delivers sufficient force to push water through long lateral runs without stressing push-fit connectors.
Thin-walled drip tape, frequently used in row crops and market gardens, requires even lower pressures, typically between 8 and 15 PSI. Exceeding 15 PSI on thin-walled drip tape can rupture the seam or cause ballooning, while running heavy-duty button emitters below 10 PSI results in erratic dribbling rather than precise gallon-per-hour output.
The Risks of High Household Water Pressure
Standard residential outdoor hose spigots deliver water at 40 to 80 PSI, and some municipal systems spike above 100 PSI during off-peak night hours. Subjecting micro-irrigation lines to unreduced household pressure leads to sudden mechanical failures. Barbed fittings can blow free from mainline poly pipe, punch-in emitters can shoot across the garden bed, and tubing can separate from coupling joints, creating geysers that flood garden beds while starving downstream plantings.
Beyond immediate blowouts, sustained high pressure creates micro-fissures in flexible vinyl micro-tubing and distorts the elastomeric diaphragms inside pressure-compensating emitters. Regulating dynamic pressure at the spigot before water enters flexible tubing protects your investment and prevents costly water waste.
Choosing and Installing the Correct Pressure Regulator
A dedicated drip pressure regulator is a non-adjustable or preset mechanical valve that lowers incoming water pressure to a fixed downstream operating level. For most home gardens, a preset 25 PSI hose-thread regulator provides the ideal compromise between distance coverage and joint security. If your layout relies entirely on drip tape or ultra-low-flow misters, choose a 15 PSI regulator instead.
Always install the pressure regulator downstream from your backflow preventer and automated timer, but immediately upstream from your mesh filter and tubing adapter. Regulators are directional, indicated by an arrow stamped on the plastic housing. Note that standard pressure regulators require a minimum flow rate, usually 0.1 to 0.5 gallons per minute (GPM), to activate their internal spring mechanism. If your zone has only two or three tiny emitters, the regulator may fail to reduce static pressure properly.
Pressure-Compensating vs. Non-Compensating Emitters
Pressure-compensating (PC) emitters contain a flexible internal silicone diaphragm that regulates water release across varying input pressures. As long as internal line pressure stays between approximately 10 and 45 PSI, a 1-gallon-per-hour PC emitter will output exactly 1 gallon per hour, whether it sits two feet or eighty feet from the faucet. These are the premier choice for sloped ground, long runs, and uneven raised bed layouts.
Non-compensating emitters, such as basic flag drippers or vortex emitters, release water based entirely on local pressure at that specific point along the pipe. In long tubing runs, emitters near the faucet run at higher flow rates, while emitters at the far end trickle weakly due to friction loss. Non-compensating fittings work best on flat, compact layouts under 30 feet in total length.
| Pressure Range | Hardware Suitability | Operational Characteristics |
|---|---|---|
| Below 10 PSI | Gravity systems, specialized low-pressure drip tape | Insufficient for standard PC emitters; flow drops significantly on long runs |
| 15 to 25 PSI | Standard garden drip tubing, button emitters, micro-sprayers | Optimal balance; secure barbed fittings, uniform flow, and minimal fitting fatigue |
| 30 to 40 PSI | Heavy-duty micro-sprinklers, commercial landscape lines | Acceptable for rigid lateral lines; upper safety threshold for standard push-fit joints |
| Above 40 PSI | Unregulated municipal water supply | Severe risk of blown connectors, loose emitters, ruptured tape, and plant washouts |
Gravity-Fed Systems and Rain Barrel Limitations
Gardeners often attempt to power micro-irrigation lines directly from a rain barrel for a small garden, but gravity delivers far lower pressure than municipal connections. Water generates roughly 0.433 PSI per vertical foot of elevation (head). A rain barrel elevated two feet on concrete blocks provides less than 1 PSI of static pressure at ground level.
Standard pressure-compensating drippers and inline regulators cannot function under gravity feed because they require 10 to 15 PSI simply to open their internal valves. For rain storage, you must omit the mechanical pressure regulator, select specialized ultra-low-pressure drip tape or open-channel drippers, and keep tubing runs short and level to achieve uniform watering.
Elevation Changes and Friction Loss Along the Line
Water pressure does not stay static as liquid travels through plastic tubing. Water moving along the inside wall of half-inch poly pipe experiences friction, causing dynamic pressure to decline over distance. Adding too many emitters or running tubing past 200 feet results in noticeable pressure drop-offs at the distal end.
Elevation shifts further alter line conditions. For every 1-foot rise in elevation up a sloped yard or into a tiered planter box, line pressure drops by 0.433 PSI. Conversely, running tubing downhill increases pressure by 0.433 PSI per foot of descent. Planning zone layouts to run lateral lines across hillsides rather than straight up slopes maintains uniform pressure across your garden beds.
Assembling a Reliable Faucet Head Assembly
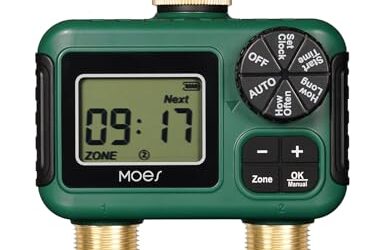
A dependable drip system begins at the spigot with a properly sequenced head assembly. The correct installation order from the threaded outdoor spigot outward is: backflow preventer, watering timer, pressure regulator, mesh filter, and tubing adapter. If you manage separate zones, adding a dual outlet hose timer allows you to schedule distinct watering frequencies for delicate seedling beds and established shrubs.
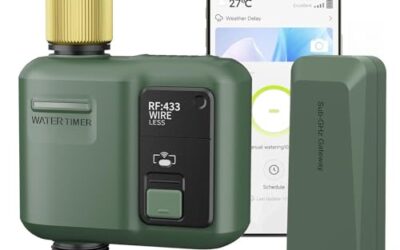
For smart scheduling based on rainfall, incorporating a smart Wi-Fi water timer ensures lines run during cool morning hours when pressure remains stable across municipal grids. Always position the filter downstream of the regulator to capture particulates that could clog low-pressure emitter orifices, and use a minimum 120-mesh or 150-mesh filter screen.
Seasonal Maintenance and Pressure Diagnostics
Checking your operating pressure at the beginning of each growing season prevents midsummer surprises. An inexpensive pressure gauge equipped with a hose-thread adapter can be attached to the end of your mainline tubing to verify that dynamic pressure stays above 15 PSI when all emitters operate.
Before winter freezing temperatures arrive, unscrew the pressure regulator and store it indoors. The internal spring mechanism and flexible rubber diaphragm can crack if trapped water freezes inside the regulator body. Flushing the mainlines with open end-caps in spring clears out silt before you reinstall the regulator.
Research Methodology and Technical Evaluation
Our watering recommendations are developed through technical analysis of irrigation engineering standards, manufacturer specifications, and residential plumbing guidelines. Rather than relying on brief promotional summaries, we review flow charts, burst pressure ratings for polyethylene and vinyl tubing, and minimum threshold requirements published by leading irrigation manufacturers.
We analyze verified owner feedback across thousands of residential installations to identify real-world failure patterns. Common recurring issues, such as popped micro-fittings, split lines during hot summer afternoons, and emitter clogging, are cross-referenced with operational pressure data to understand where systems break down. We also evaluate suitability across varying yard geometries, including compact urban containers and multi-tiered raised bed layouts.
This guide synthesizes technical reference specifications and practical gardening practices without claiming simulated or laboratory physical testing. Our assessment focuses on real-world reliability, component compatibility, and long-term garden health. Technical recommendations were reviewed and verified for currency during September 2026.
Frequently Asked Questions
What happens if drip irrigation pressure is too high?
When pressure exceeds 30 to 40 PSI, standard barbed fittings and punch-in emitters can pop loose from the mainline tubing, causing massive localized leaks. Excessive pressure can also stretch or split thin-walled tubing and damage the internal diaphragms of pressure-compensating emitters, destroying their flow calibration.
Can I connect a drip irrigation system directly to a garden spigot without a regulator?
You should never connect drip irrigation directly to a household spigot without a pressure regulator. Outdoor spigots typically output between 40 and 80 PSI, which far exceeds the safe operating threshold of residential micro-tubing and push-fit connectors. Installing a 20 to 25 PSI regulator at the faucet protects your lines against ruptures.
What is the difference between water pressure and water flow in a drip system?
Water pressure, measured in pounds per square inch (PSI), represents the force pushing water through the pipes, while flow rate, measured in gallons per hour (GPH) or gallons per minute (GPM), represents the volume of water moving through the line. A drip system requires low pressure (around 25 PSI) to protect fittings, while total flow rate determines how many emitters you can run on a single zone.
What pressure does drip irrigation need when using drip tape instead of tubing?
Thin-walled drip tape requires lower pressure than standard half-inch poly tubing, typically operating between 8 and 15 PSI. For drip tape layouts, install a dedicated 10 to 15 PSI regulator, as standard 25 or 30 PSI regulators exert too much force and can split the seams of thin-walled tape lines.
Can a drip irrigation system work on gravity feed alone?
A standard drip system using pressure-compensating emitters will not work on gravity feed because gravity from a rain barrel typically produces only 1 to 3 PSI, which cannot open standard emitter diaphragms. To run drip irrigation from rain barrels, omit mechanical pressure regulators and install specialized ultra-low-pressure drip tape or open micro-tubing designed specifically for gravity applications.
Where should the pressure regulator be installed in the assembly?
The pressure regulator should be installed downstream from your backflow preventer and hose timer, but immediately upstream from your 150-mesh filter and tubing adapter. Placing the timer before the regulator ensures the timer valve operates under standard line pressure, while downstream micro-tubing receives safe, regulated flow.
Continue your garden research
Browse more practical guides in Watering & Irrigation.
For product comparisons, see Best Drip Irrigation Kits for Raised Beds, Compared.
See how Dove Creek Gardens researches and compares products.