


Flushing out a home drip line is one of the most critical maintenance steps for keeping plants hydrated and avoiding uneven water distribution. Over time, sediment, organic algae, mineral scale, and tiny soil particles accumulate inside mainline tubing and micro-tubing. If left uncleaned, this debris quickly clogs narrow emitter orifices, resulting in parched root zones and stressed plants. Knowing how to flush a drip irrigation system properly protects your initial investment and ensures your garden receives consistent moisture throughout the growing season.
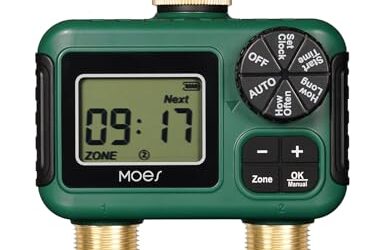
This comprehensive guide is designed for home gardeners, raised bed growers, and homeowners maintaining residential drip zones. Whether you operate a small patio container arrangement or an extensive vegetable plot, flushing the lines at installation, periodically during mid-season, and before winter storage prevents costly emitter replacements. Proper line clearing also ensures that upstream devices, such as a dual outlet hose timer, deliver water through unconstricted lines at optimal operating pressure.
Because effective line flushing relies on hardware fittings, water velocity, and zone layout rather than proprietary kits, this guide evaluates the core mechanical processes, flush valve fittings, and end closures needed for clean operation. In our ongoing review of watering and irrigation practices, we examine the standard operating procedures that maintain line health across various garden setups.
1. Inspect and Clean the Head Assembly Filter
Before opening any line ends out in the garden beds, begin at the water source. Every reliable drip irrigation system requires an upstream screen or disc filter positioned after the backflow preventer and pressure regulator. Turn off the water supply, unscrew the filter canister, and remove the mesh element. Rinse away collected sand, silt, and rust flakes under a utility faucet or in a clean bucket. Reinserting a clean filter screen ensures you do not push fresh sediment into downstream lateral pipes during the flushing process.
2. Open the Distal Ends of the Main Lateral Tubing
Walk to the furthest ends of your primary distribution lines (commonly 1/2-inch or 3/4-inch polyethylene tubing). Remove the end fittings, which are typically figure-eight hose end closures, threaded flush caps, or manual ball valves. Pull the tubing straight out from the mulch or soil so the open end points into a clear space or drainage trench. Keeping the exit unobstructed prevents dirt from being sucked back into the line when the water is turned off.
3. Run High-Velocity Water Through the Mainlines
Turn the water source on to full flow. Because the line ends are completely open, water moves at a significantly higher velocity than during normal micro-irrigation cycles. This surging rush creates sufficient turbulence to dislodge settled silt, sand grains, and organic residue from the tubing walls. Allow the water to run freely from each open end for 30 to 60 seconds, or until the discharge stream flows completely clear without cloudiness or particulates.
4. Close Mainline Ends and Flush Sub-Laterals
Turn off the supply briefly, reinstall the end closures or tighten the flush caps on the primary lines, and then inspect the individual drip runs. In systems using 1/4-inch micro-tubing or branching emitter lines, remove the plug or stop fitting at the end of each branch. Turn the zone back on to purge the secondary lines. Because 1/4-inch tubing has a narrow internal diameter, even tiny specks can choke emitters if the line ends are not regularly vented.
5. Check Emitter Performance and Seal the System
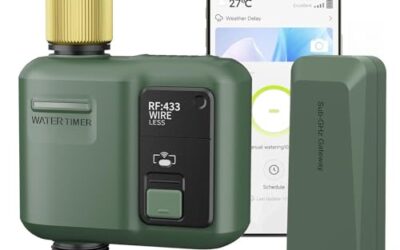
With all lines purged and capped, bring the irrigation system up to its regular operating pressure. Walk the beds while the system runs. Verify that inline drip emitters or micro-sprayers show regular dripping patterns rather than forceful spurts or weak dribbles. If an emitter remains clogged, gently unscrew its cap if it is a serviceable model, or poke the orifice with an emitter cleaning tool or fine wire. Automating your watering with an efficient controller like a Wi-Fi water timer for garden hose makes routine checkups easy to trigger directly from your smartphone.
Choosing Between Manual Flush Caps and Automatic Flush Valves
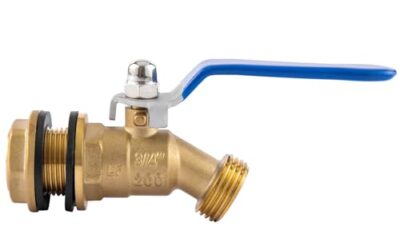
Gardeners can choose between manual end closures and automatic flush valves based on convenience and garden size. Manual figure-eight clamps and threaded end caps are inexpensive, durable, and leak-resistant, but they require you to physically visit each lateral end during scheduled maintenance. For larger gardens or older gardeners who prioritize physical accessibility, automatic flush valves open each time the system pressurizes and close once water pressure reaches approximately 5 to 10 PSI. While automatic valves vent minor sediment automatically on every run cycle, they can sometimes stick open if coarse grit enters the diaphragm chamber.
| Fitting Type | Advantages | Tradeoffs | Best Use Case |
|---|---|---|---|
| Figure-Eight End Clamp | Inexpensive, no moving parts, simple to slide off | Requires manual grip strength, can slip under extreme pressure | Small vegetable gardens and raised beds |
| Threaded Flush Valve / Hose End | Positive mechanical seal, easy to vent into a bucket | Higher initial cost, threads can collect gritty soil | Permanent landscape beds and orchard rows |
| Automatic Diaphragm Flush Valve | Hands-free purging at every watering cycle | Moving parts can fail, requires minimum pressure to seal | Large properties, vacation properties, low-mobility setups |
Seasonal Timing and Water Quality Factors
How often you should flush your drip system depends directly on your water source and the calendar season. Municipal water systems contain few suspended particles, meaning a thorough spring startup flush and an autumn shutdown flush are usually sufficient. However, if your irrigation draws from a pond, well, or gravity-fed rain harvesting setup, fine biological matter and mineral carbonates accumulate rapidly. Under those conditions, schedule a line flush every three to four weeks. Setting up a dependable automatic watering system for vacation ensures plants remain watered while you are away, but line purging beforehand is vital to prevent mid-summer line blockages.
Winterization and Freezing Climate Protection
In regions where ground temperatures drop below freezing, flushing lines doubles as an essential winterization routine. Residual water trapped in polyethylene tubing expands as it freezes, splitting fittings, rupturing micro-tubing, and popping out barbed connectors. When completing your final autumn flush, leave the line ends open and either blow out the system using a regulated low-pressure air compressor (below 30 PSI) or elevate the tubing slightly along slopes to let gravity drain all low spots thoroughly.
Research Methodology and Trust
At Dove Creek Gardens, our editorial analysis combines practical horticulture best practices with mechanical plumbing principles. Rather than relying on simulated laboratory claims or fabricated product reviews, our research evaluates documented component specifications, hydraulic flow dynamics, and widespread gardener feedback across diverse soil and climate environments.
For this September 2026 maintenance guide, we screened industry standard irrigation designs, agricultural extension recommendations, and common failure points reported by home gardeners. We evaluated tubing diameter tolerances, pressure thresholds, and sediment retention factors. Our recommendations prioritize long-term line durability, water efficiency, and accessible maintenance solutions for gardens of all sizes.
Frequently Asked Questions
How often should I flush my drip irrigation lines?
Most gardens on municipal tap water require flushing twice a year: once in spring when commissioning the system, and once in late autumn before winter frosts. If your water comes from a well, pond, or rain barrel containing fine silt, flush the lines every three to four weeks during the height of the summer growing season.
Can I flush a drip line without taking off the emitters?
Yes. In fact, you should leave your inline and punch-in emitters in place while flushing. You simply open the terminus end caps of the 1/2-inch or 1/4-inch tubing lines. Water rushes through the path of least resistance out the open ends, expelling sediment before it reaches the emitter openings.
What pressure is required to properly flush drip tubing?
Standard household water pressure regulated to between 20 and 30 PSI provides plenty of scouring velocity to clean 1/2-inch drip tubing. Never exceed 40 PSI, as excessive pressure can burst poly tubing connections or blow barbed emitter fittings out of the line walls.
How do I clean mineral deposits or hard water buildup inside lines?
For severe calcium or hard water scaling, a mild organic acid flush such as agricultural food-grade white vinegar can be used. Disconnect your lines from the garden beds, circulate a diluted vinegar solution through the tubing, let it sit for several hours to dissolve carbonate crusts, and flush thoroughly with clean freshwater before reconnecting plant lines.
Why is water still dirty after flushing for two minutes?
If water continues to run cloudy, inspect your head assembly filter screen immediately. A torn mesh screen or cracked filter housing allows fresh silt to enter the line continuously from your primary water source. Replace damaged filter elements before finishing the line flushing process.
Continue your garden research
Browse more practical guides in Watering & Irrigation.
For product comparisons, see Best Drip Irrigation Kits for Raised Beds, Compared.
See how Dove Creek Gardens researches and compares products.