


Learning how to fill a raised garden bed cheaply is mostly a matter of using the right material in the right place. The goal is to create enough healthy growing medium for plant roots while avoiding the unnecessary cost of filling the entire structure with premium bagged potting mix. A good plan also accounts for settling, drainage, access, and the crops you intend to grow.
This guide is for homeowners, beginner gardeners, older gardeners, and small-space growers who want a practical approach rather than a product comparison. There are no product recommendations or rankings here. Instead, the guide explains how to estimate volume, combine affordable materials, avoid common mistakes, and decide when a raised bed is worth filling in stages. For related planter options, see the Raised Beds & Planters category.
When comparing inexpensive filling strategies, focus on the bed’s internal dimensions, the depth required by your crops, the quality and cleanliness of each material, how much the contents may settle, and how easily you can amend the bed later. The cheapest initial fill is not always the cheapest long-term choice if it drains poorly, contains contaminants, or needs to be replaced.
1. Calculate the amount of material you need
Measure the bed’s inside length, inside width, and the depth you plan to fill. Multiply length by width by depth to estimate cubic volume. Keep the units consistent, such as feet for all three measurements, and remember that the result describes the space before settling.
For a new bed, buying slightly more material than the calculated volume can be sensible because organic materials and loose soil may settle after watering and planting. Avoid ordering a large surplus before checking the supplier’s delivery minimums, because excess material can erase the savings you expected from buying in bulk.
2. Use native soil when it is suitable
If the bed is open to the ground, existing soil can reduce the amount of purchased material. Remove obvious weeds, roots, rocks, and debris, then consider using the native soil as part of the lower fill if it is not contaminated and does not stay waterlogged. A raised bed does not automatically make unsuitable soil safe for food gardening.
Soil from a clean area of your property may be less expensive than bagged soil, but it can be heavy and may contain more clay or sand than your plants prefer. Mixing it with finished compost or another known soil amendment can improve the planting layer, but the exact proportion should depend on the soil’s texture and the crops being grown rather than a fixed recipe.
3. Reserve the best mix for the root zone
One of the most reliable ways to lower cost is to place the highest-quality material where plant roots will actually grow. A deeper bed can use clean, stable bulk material below and a more carefully prepared blend near the surface. The top layer should be deep enough for the crops you plan to grow, especially root vegetables and plants with large root systems.
A common budget blend uses screened topsoil or suitable native soil combined with finished compost. Compost contributes organic matter, but it should not be treated as a complete substitute for soil or used in excessive amounts without considering how quickly it may decompose and settle. Buy only finished compost from a source that can explain what materials were processed.
4. Consider a layered fill, but know its limits
For a tall bed, some gardeners use a layered approach with coarse, clean organic materials in the lower portion and soil-compost mix above. Examples may include untreated branches, leaves, or other plant material that is free from disease and invasive weeds. These materials break down over time, so the bed will settle and may need additional soil later.
Layering is less suitable when you need a precise, stable growing depth immediately, when the bed is shallow, or when you are growing crops that need consistent root conditions. Do not use painted, chemically treated, or unknown wood, construction debris, trash, diseased plant material, or materials that may have been exposed to contaminants. A cheap filler is not a bargain if it creates a disposal or soil-quality problem.
5. Do not fill the bottom with gravel by default
Adding a gravel layer is a common response to concerns about drainage, but it is not a universal solution for a raised bed. Water movement depends on the textures of the materials above and below the gravel, the bed’s drainage openings, and the surrounding ground. Gravel also takes up valuable volume that could otherwise hold root-supporting material.
Instead, check that the bed can drain where it is installed and avoid placing it in a location that regularly collects water. If the bed sits on a patio or another sealed surface, drainage design matters more, and the structure may require a suitable liner or drainage arrangement that does not block outlets. Follow the planter manufacturer’s instructions when a specific design is involved.
6. Compare bulk soil with bagged materials
Bulk soil and compost often become more economical as the bed size increases, but delivery fees, minimum orders, and access for a truck or wheelbarrow can change the calculation. Bagged materials are easier to transport in small quantities and may be more practical for a balcony, patio, or single compact bed, even when the per-volume price is higher.
- Choose bulk material when you need substantial volume and can verify its source and composition.
- Choose bags when you have limited storage, need to fill gradually, or cannot accommodate a bulk delivery.
- Ask how volume is measured and whether the material is screened, composted, or blended before comparing prices.
- Include delivery, hauling, containers, and labor in the total cost rather than comparing sticker prices alone.
7. Match the fill to your crops and access needs
Not every crop needs the same root depth. Leafy greens and many herbs can work in a shallower planting layer than long carrots, parsnips, or large fruiting plants. Planning the crop layout before buying materials can prevent you from paying to fill areas that do not need full depth.
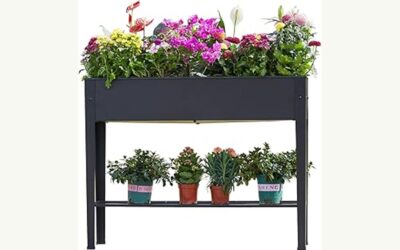
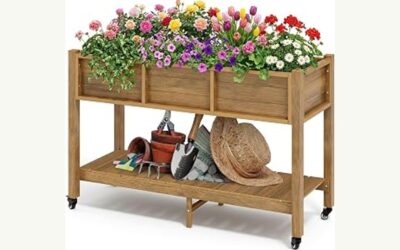
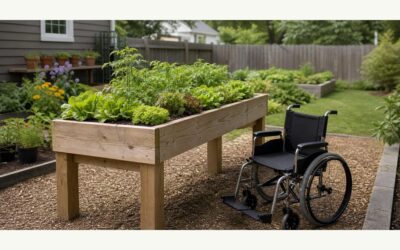
Accessibility also affects the best design. A taller bed can reduce bending, but it requires more material and must be stable on its base. Narrower beds can make it easier to reach the center without stepping into the soil. In a small space, a planter designed for compact growing may be more economical than filling a large structure; for example, compare the needs of a railing planter for vegetables before committing to a full-size raised bed.
8. Plan for settling and yearly maintenance
Organic layers shrink as they decompose, and loose soil may compact after rain and irrigation. Leave some space below the bed rim so water does not wash soil over the sides, then check the level after the first growing season. Top up with suitable soil and finished compost as needed rather than rebuilding the entire bed.
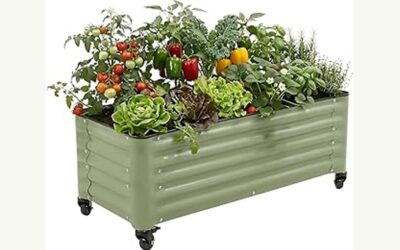
Keep records of what you add, especially if you grow food. Store unused bagged materials off the ground and protect them from prolonged exposure to rain. If you are using a planter with a built-in irrigation feature, review its drainage and watering requirements before adding soil; the guide to a self-watering raised garden bed may help you compare that type of setup.
Research Methodology and Trust
This article was prepared as a topic guide rather than a product ranking. No item passed relevance screening for the task of filling a raised garden bed cheaply. No product specifications, prices, owner feedback, or brand claims were available to compare.
The practical analysis focuses on the factors that determine total cost and long-term usefulness: internal bed volume, material quality, soil depth, drainage, settling, transport, storage, and access. It also separates a lower purchase price from the broader ownership cost of hauling material, correcting poor drainage, replacing contaminated fill, or topping up a bed that settles substantially.
This is research-based gardening guidance, not physical testing or an evaluation of a particular product. Recommendations can change with local soil conditions, municipal compost rules, delivery charges, bed construction, and the crops being grown. The guidance was reviewed for this update in August 2026 and should be adapted to local conditions.
Frequently Asked Questions
What is the cheapest way to fill a raised garden bed?
There is no single cheapest material for every bed. Using suitable native soil as part of the fill, buying verified bulk material when the volume is large enough, and placing finished compost mainly in the root zone can reduce cost without treating unknown waste as soil.
Can I fill a raised bed with only garden soil?
You can use garden soil as part of the fill when it comes from a clean area and drains reasonably well, but its texture and quality may not suit every crop. Consider blending it with suitable finished compost or another known amendment, and avoid using soil from areas with possible contamination.
Should I put logs or branches in the bottom?
Clean, untreated plant material can be used in some deep beds as a lower layer, but it will decompose and the bed will settle. This approach is less suitable when you need a stable depth right away or when the material’s origin cannot be verified.
Do I need gravel under a raised garden bed?
Not by default. First check the bed’s drainage openings and the condition of the ground beneath it. Gravel takes up space and does not correct every drainage problem, particularly when the bed is placed on a sealed surface.
How much compost should I add when filling cheaply?
The right amount depends on the existing soil, the compost’s maturity, and the crops. Use finished compost as an amendment to a soil-based growing medium rather than assuming that a bed should be filled entirely with compost.
How do I avoid wasting money on raised-bed fill?
Measure the internal volume, compare bulk and bagged costs including delivery, and plan the crop layout before ordering. Leave room for settling, verify the source of bulk material, and do not pay for deep fill in areas that do not need it.
How should I store leftover soil and compost?
Keep leftover materials contained and protected from prolonged rain, while allowing enough ventilation to prevent stagnant, waterlogged storage. Label each material so you know whether it is soil, compost, mulch, or an amendment before using it in a future bed.
Continue your garden research
Browse more practical guides in Raised Beds & Planters.
For product comparisons, see Best Galvanized Raised Garden Beds 2026: Reviews and Buying Guide.
See how Dove Creek Gardens researches and compares products.