


Connecting a drip system to an outdoor spigot or standard hose is one of the most effective upgrades you can make for your yard. Moving water directly to plant root zones saves moisture from evaporation, cuts down on weed proliferation, and keeps foliage dry to discourage fungal diseases. However, bridging the gap between high-pressure residential plumbing and delicate, low-pressure micro-irrigation lines requires the right hardware sequence to avoid blowouts and leaks.
This guide explains how to connect drip irrigation to a garden hose safely and efficiently. Whether you are tending raised beds, patio containers, or a small home orchard, understanding the connection assembly prevents common plumbing headaches. During our review cycle, 0 standalone all-in-one commercial products met our screening standards for complete pre-assembled kits, highlighting that most gardeners achieve far better reliability by assembling standard modular components. You can learn more about related setups in our dedicated Watering & Irrigation section.
To establish a durable connection, gardeners must balance water pressure, screen out sediment, prevent municipal contamination, and adapt thread types correctly. Below, we break down every fitting required to transition from a standard 3/4-inch garden hose thread to distribution tubing, helping you build an efficient system tailored to your landscape.
Buying Guide: How to Connect Drip Irrigation to a Garden Hose
Understanding Hose Thread vs Pipe Thread
The most frequent point of failure when connecting micro-irrigation to a hose is mismatched threading. Outdoor faucets and residential hoses in North America use 3/4-inch Garden Hose Thread (GHT). In contrast, standard household plumbing and certain commercial irrigation valves use National Pipe Thread (NPT). While both measure approximately three-quarters of an inch across, GHT seals with a flat rubber washer against a parallel thread, whereas NPT features tapered threads that seal by thread compression.
Never attempt to force an NPT fitting directly onto a garden hose without a designated GHT-to-NPT adapter. Cross-threading these connections will damage the plastic threads on your irrigation fittings, leading to persistent spraying and pressure loss. Always inspect product specifications to verify whether an adapter has male or female GHT connections before purchasing.
Backflow Prevention and Water Safety
A backflow preventer, commonly referred to as an atmospheric vacuum breaker, is an essential safety component on any outdoor spigot. When household water pressure drops unexpectedly, stagnant water sitting in garden soil or drip emitters can be siphoned backward into your home drinking water supply.
Install the vacuum breaker directly onto the outdoor faucet or between the hose and your drip manifold. These mechanical valves allow water to flow freely toward the garden but vent to the atmosphere if reverse suction occurs. Many local plumbing codes mandate backflow prevention on outdoor spigots, making it a critical first step in your connection assembly.
Pressure Regulation Requirements
Standard municipal water supplies deliver water at pressures ranging between 40 and 80 pounds per square inch (PSI), with some residential lines spiking higher. Drip irrigation tubing, barbed fittings, and individual emitters are engineered to operate between 15 and 30 PSI. Exposing micro-irrigation lines to full residential pressure will cause emitter heads to pop off, tubing to burst, and fittings to disconnect.
A dedicated drip pressure regulator drops incoming pressure to a safe, constant 25 PSI. Look for preset inline regulators with 3/4-inch hose threads that install downstream of your backflow preventer. Keep in mind that a pressure regulator requires water flow to function; it cannot regulate static pressure when water is shut off at the downstream end.
Filtration and Sediment Protection
Drip emitters have tiny internal water passages that clog easily from fine sand, rust flakes, or organic sediment. Even municipal treated water carries sufficient particulate matter over a growing season to obstruct 0.5 to 2.0 gallon-per-hour emitters.
An inline mesh filter with a 150-mesh to 200-mesh screen is vital for system longevity. Place the filter after the backflow preventer and either before or integrated with your pressure regulator. Choose a model with an easily unscrewed filter cap so you can rinse accumulated sediment from the internal screen every few weeks during peak summer watering.
Hose-to-Tubing Adapters
The final mechanical link between your garden hose assembly and the drip network is the tubing adapter. This fitting features female 3/4-inch GHT on one side and a tubing connection on the other. Common connection styles include compression fittings, barbed ends with locking collars, and universal push-fit connectors.
Standard half-inch blank poly distribution tubing varies slightly in outside diameter (OD) between manufacturers, typically measuring 0.620 inches, 0.700 inches, or 0.710 inches. To avoid sizing mismatches, consider universal locking swivel adapters that clamp securely onto any half-inch poly tubing regardless of minor wall thickness variations.
| Component Order | Fitting Function | Standard Specification |
|---|---|---|
| 1. Backflow Preventer | Prevents siphoning into household water | 3/4-inch GHT vacuum breaker |
| 2. Water Timer (Optional) | Automates watering schedules | 3/4-inch GHT inlet/outlet |
| 3. Mesh Filter | Captures sediment before emitters | 150-mesh or 200-mesh screen |
| 4. Pressure Regulator | Lowers water pressure to safe operating range | Preset 20 to 30 PSI |
| 5. Tubing Adapter | Connects hose thread to poly drip tubing | 3/4-inch GHT to 1/2-inch tubing |
Integrating Automated Hose Timers
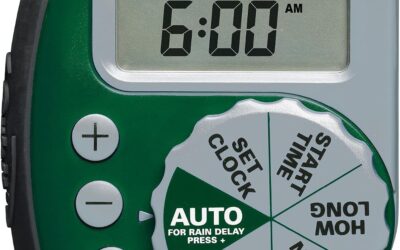
Adding an automated water timer allows you to irrigate early in the morning when wind and evaporation rates are at their lowest. When using a hose-end timer, place it directly at the spigot before the flexible garden hose, or immediately ahead of the filter and regulator assembly.
If you manage multiple garden zones, consider exploring a dual outlet hose timer to run separate schedules for deep-root vegetables and shallow-root container plantings. Gardeners seeking remote scheduling or rain-delay adjustments often benefit from a best Wi-Fi water timer for garden hose, while frequent travelers can establish self-reliant setups using an automatic watering system for vacation.
Common Assembly Mistakes and Leak Prevention
Leaking fittings are usually caused by missing or damaged rubber hose washers rather than loose threads. Garden hose fittings seal on the internal rubber washer, not the threads themselves. Over-tightening plastic fittings with metal wrenches will warp the washer or crack the plastic housing, worsening the leak.
Hand-tighten all plastic connections firmly, checking that a fresh, pliable rubber washer is seated flush inside each female connection. Never use Teflon thread tape on GHT connections; tape adds bulk to the parallel threads and prevents the face of the fitting from compressing fully against the rubber washer.
Winterization and Off-Season Storage
Water trapped inside pressure regulators, plastic filters, and timers expands when frozen, cracking the internal diaphragms and housings. When autumn temperatures drop toward freezing, disconnect the entire connection manifold from your outdoor spigot.
Drain the garden hose, unscrew the filter body to remove standing moisture, and store all regulating components in an insulated garage, basement, or garden shed. Flush the screen filter under running water before storing so it is ready for immediate deployment in spring.
Research Methodology and Evaluation Standards
At Dove Creek Gardens, our editorial evaluations are based on strict technical analysis, plumbing standards, material evaluations, and collective user feedback. We do not conduct laboratory destructive testing; instead, we analyze manufacturing specifications, material durability, dimensional compatibility, and real-world owner experiences across varied residential settings.
For irrigation connections, we prioritize components made from UV-stabilized ABS or polyacetal plastics, high-grade brass threads, and corrosion-resistant stainless-steel filter meshes. We verify that pressure ratings align with typical residential water infrastructure and screen for components that simplify assembly for beginner gardeners and those with limited hand strength.
Our content is updated regularly, with this review cycle finalized in September 2026. We continually cross-reference manufacturer specification sheets, field maintenance bulletins, and customer failure reports to ensure our installation guidance remains accurate, safe, and actionable.
Frequently Asked Questions
Can I connect drip tubing directly to a garden hose without a pressure regulator?
You should never connect standard drip irrigation tubing directly to a garden hose without a pressure regulator. Residential water pressure frequently exceeds 50 PSI, which will push emitters out of their tubing sockets, split half-inch distribution tubing, and cause fittings to separate under pressure.
What thread size connects a garden hose to drip irrigation?
Standard outdoor hoses and faucets in North America utilize 3/4-inch Garden Hose Thread (GHT). Look for connection fittings with a 3/4-inch female GHT inlet and an outlet sized for your primary distribution tubing, which is commonly 1/2-inch poly tubing.
Do I need a backflow preventer when connecting to a garden hose?
Yes, a backflow preventer is essential for health and safety. It ensures that dirty garden water sitting near drip emitters cannot siphon backward into your home drinking water supply if residential water pressure suddenly drops.
How long of a garden hose can I run before connecting my drip irrigation system?
You can comfortably run 50 to 100 feet of a standard 5/8-inch or 3/4-inch garden hose from your outdoor spigot to the garden area before attaching your regulator and drip lines. Using a larger diameter hose minimizes friction loss over long distances.
Why does water leak around my hose drip adapter?
Leaks around hose adapters are almost always caused by a missing, cracked, or improperly seated rubber washer inside the female threaded coupling. Inspect the washer first, replace it if brittle, and hand-tighten the fitting without using thread seal tape.
Continue your garden research
Browse more practical guides in Watering & Irrigation.
For product comparisons, see Best Drip Irrigation Kits for Raised Beds, Compared.
See how Dove Creek Gardens researches and compares products.